So, I still have a sprained wrist...slowest healer ever? Probably. But I have received a steroid shot and praying it works like a miracle and I'll be knitting again in no time! However, since I can barely knit in the meantime, I'm resorting to blogging about past knitting. I actually have wanted to post this pattern for a while, since it was the first pattern I ever designed from scratch...and I'm kind of proud!
There is someone super cute and super important in my life...and his name isJordan Bailey!!! He belongs to Jordan's parents, and with the winter here and chilling us all, he needed some protection (and style!).
I used classic wool for durability and warmth with a size 5 needle for the ribbing, and 6 for the rest of the pattern. You can use larger...depends on the size of your puppy! Bailey is about 5 lbs.
Abbreviations I will use:
C: Slip 3 stitches onto a cable needle, or spare double pointed needle, and hold to front. Knit 3 stitches. Knit 3 stitches from cable needle.
MB: Make bobble. Do this by knitting once into the front of the stitch, then knit into the back, then the front, then the back, and finally into the front. You will end up with 5 stitches where there used to be one. Turn your work. Purl 2 together, purl 1, purl 2 together. Turn your work. Knit the 3 remaining stitches together.
If anyone is confused about these, let me know and I will post a video or help you out!
For the top half:
Cast on 47 stitches
Rows 1-10: K1, P1 across
Row 11: K8, P4, K6, P11, K6, P4, K8
Row 12: P8, K4, P6, K11, P6, K4, P8
Row 13: Same as 11
Row 14: P8, K4, P6, K5, MB, K5, P6, K4, P8
Row 15: K8, P4, C, P11, C, P4, K8
Row 16: Same as 12
Row 17: Same as 11
Row 18: P8, K4, P6, K4, MB, K1, MB, K4, P6, K4, P8
Row 19: Same as 11
Row 20: Same as 12
Row 21: Same as 15
Row 22: Same as 14
Row 23: Same as 11
Row 24: Same as 18
Row 25: Same as 11
Row 26: Same as 14
Row 27: Same as 15
Row 28: Same as 12
Row 29: Same as 11
Row 30: Same as 14
Row 31: Same as 11
Row 32: Same as 18
Row 33: Same as 15
Row 34: Same as 14
Row 35: Same as 11
Row 36: Same as 12
Row 37: Same as 11
Row 38: Same as 14
Row 39: Same as 15
Row 40: Same as 18
Row 41: Same as 11
Row 42: Same as 14
Row 43: Same as 11
Row 44: Same as 12
Row 45: Same as 15
Row 46: Same as 14
Row 47: Same as 11
Row 48: Same as 18
Row 49: Same as 11
Row 50: Same as 14
Row 51: Same as 15
Row 52: Same as 12
Row 53: Same as 11
Row 54: Same as 14
Row 55: Same as 11
Row 56: Same as 18
Row 57: Same as 15
Row 58: Same as 14
Row 59: Same as 11
Row 60: Same as 12
Row 61: Same as 11
Row 62: Same as 14
Row 63: Same as 15
Row 64: Same as 18
Row 65: Same as 11
Row 66: Same as 14
Row 67: Same as 11
Row 68: Same as 12
Rows 69-80: K1, P1
As this is my first attempt at writing a real patten, I'm hopeful there are no mistakes...but if you find one, please share :)
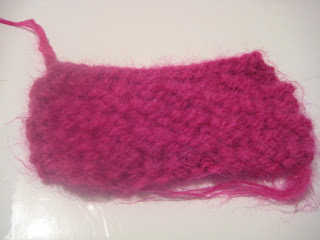
The top when it's finished should look like this! This is my sweater on it's blocking table...
For the bottom half:
Cast on 19 st.
Rows 1-26, 28-39, 41-49, 51-52: Knit in stockinette stitch (ie, K one row, P the the next).
Row 27, 40, 50: K2tog on the first and last stitch in the row
Rows 53-62: K1, P1 across
When you are done both parts, block them. For an easy way to block, see this post.
Start your seaming at the top (neck) ribbing. Then sew about 4 stiches into the main body. Skip 16 stitches on the top part, and 22 stitches on the bottom part to leave room for leg holes and begin to seam again. When finished, it should look like this:
This counts as my first sweater, right?
There is someone super cute and super important in my life...and his name is
I used classic wool for durability and warmth with a size 5 needle for the ribbing, and 6 for the rest of the pattern. You can use larger...depends on the size of your puppy! Bailey is about 5 lbs.
Abbreviations I will use:
C: Slip 3 stitches onto a cable needle, or spare double pointed needle, and hold to front. Knit 3 stitches. Knit 3 stitches from cable needle.
MB: Make bobble. Do this by knitting once into the front of the stitch, then knit into the back, then the front, then the back, and finally into the front. You will end up with 5 stitches where there used to be one. Turn your work. Purl 2 together, purl 1, purl 2 together. Turn your work. Knit the 3 remaining stitches together.
If anyone is confused about these, let me know and I will post a video or help you out!
For the top half:
Cast on 47 stitches
Rows 1-10: K1, P1 across
Row 11: K8, P4, K6, P11, K6, P4, K8
Row 12: P8, K4, P6, K11, P6, K4, P8
Row 13: Same as 11
Row 14: P8, K4, P6, K5, MB, K5, P6, K4, P8
Row 15: K8, P4, C, P11, C, P4, K8
Row 16: Same as 12
Row 17: Same as 11
Row 18: P8, K4, P6, K4, MB, K1, MB, K4, P6, K4, P8
Row 19: Same as 11
Row 20: Same as 12
Row 21: Same as 15
Row 22: Same as 14
Row 23: Same as 11
Row 24: Same as 18
Row 25: Same as 11
Row 26: Same as 14
Row 27: Same as 15
Row 28: Same as 12
Row 29: Same as 11
Row 30: Same as 14
Row 31: Same as 11
Row 32: Same as 18
Row 33: Same as 15
Row 34: Same as 14
Row 35: Same as 11
Row 36: Same as 12
Row 37: Same as 11
Row 38: Same as 14
Row 39: Same as 15
Row 40: Same as 18
Row 41: Same as 11
Row 42: Same as 14
Row 43: Same as 11
Row 44: Same as 12
Row 45: Same as 15
Row 46: Same as 14
Row 47: Same as 11
Row 48: Same as 18
Row 49: Same as 11
Row 50: Same as 14
Row 51: Same as 15
Row 52: Same as 12
Row 53: Same as 11
Row 54: Same as 14
Row 55: Same as 11
Row 56: Same as 18
Row 57: Same as 15
Row 58: Same as 14
Row 59: Same as 11
Row 60: Same as 12
Row 61: Same as 11
Row 62: Same as 14
Row 63: Same as 15
Row 64: Same as 18
Row 65: Same as 11
Row 66: Same as 14
Row 67: Same as 11
Row 68: Same as 12
Rows 69-80: K1, P1
As this is my first attempt at writing a real patten, I'm hopeful there are no mistakes...but if you find one, please share :)
The top when it's finished should look like this! This is my sweater on it's blocking table...
Cast on 19 st.
Rows 1-26, 28-39, 41-49, 51-52: Knit in stockinette stitch (ie, K one row, P the the next).
Row 27, 40, 50: K2tog on the first and last stitch in the row
Rows 53-62: K1, P1 across
When you are done both parts, block them. For an easy way to block, see this post.
Start your seaming at the top (neck) ribbing. Then sew about 4 stiches into the main body. Skip 16 stitches on the top part, and 22 stitches on the bottom part to leave room for leg holes and begin to seam again. When finished, it should look like this:
Voila! One fashionable, warm pooch!
 |
| Aww :) |


